I am making a step by step process of coloring my line work, starting now, so this may take a while! Hopefully this may help someone.
STEP 1:
You need your artwork to be at the printing size you want on the tshirt. My image size here is 12x19 inches at 300 dpi.
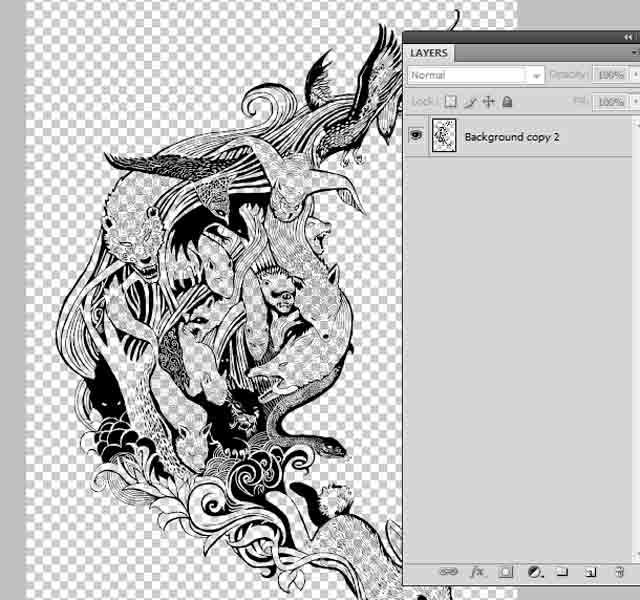
As shown, you need to have your line work on a layer by itself. Note that only black is present on the layer, no white or any other color.
If you draw scan your artwork in, you can use the super handy photoshop action here:
http://www.threadless.com/profile/63134/stickymike/blog/305238/Linework_Making_Action_for_Photoshop
Running this action will give you a layer that isolates your art on a separate transparent layer, like in the picture above.
Step 2.
Ok your linework is isolated without any colors.
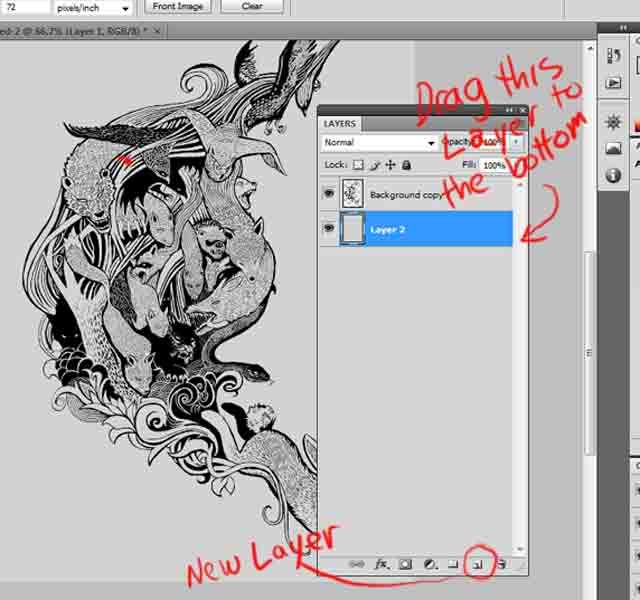
In your layers palette, click on the new layer button, and make sure you drag it below your layer with your linework.
Now select a neutral gray color in your color picker and press ctrl+backspace (you can also use the paint bucket tool) to fill the entire layer you just created with the gray color.
Step 3.
In this stage I am going to add my highlights to my image. I am not concerned with colors yet, because getting the values right is more important.
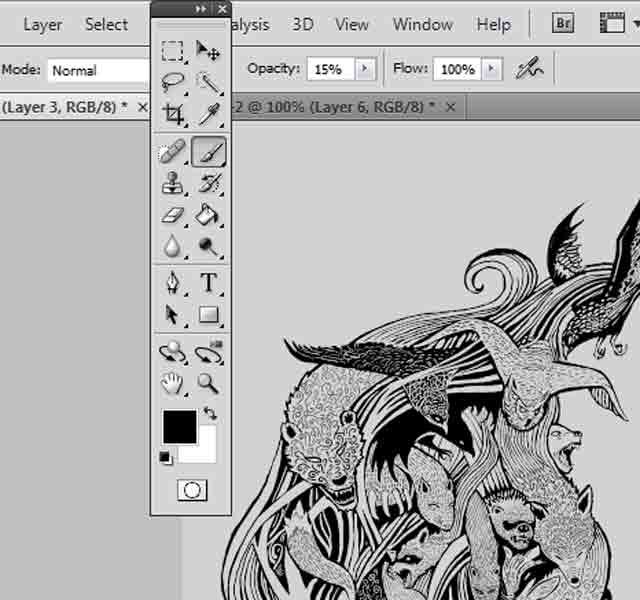
First, create a new layer right above the gray layer.
Click on the layer to make it active. Now choose black in your color picker. Next in the brush setting make sure your opacity is set to around 15 percent.
Ok start painting the highlights in.
Even though it looks like i am painting shadows, these will actually be highlights where the light is hitting. For the sake of the tutorial, i'll just do the fox and surrounding area.
With the low brush opacity, you will be able to layer the brush strokes so that you get a pretty smooth tone.
Step 5: halftoning

Ok now I am ready to turn my highlights into halftones.
First hold down ctrl and click on the thumbnail of the layer that you just painted on. You should get the "marching ants" showing that you have made a slection.
With the selection still active, open your channel palette and make a new channel. rename it to "highlights"
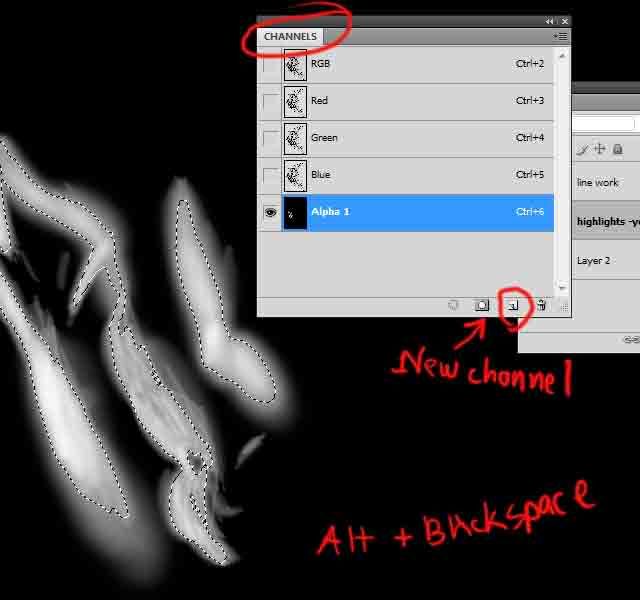
Press alt + backspace to fill the slection with white. Now deselect everything by pressing control+d. Go to filter-pixilate-color halftone.

Put in the settings as shown. a bigger max radius makes your halftone dots bigger. I like around 7 or 8 at this size.
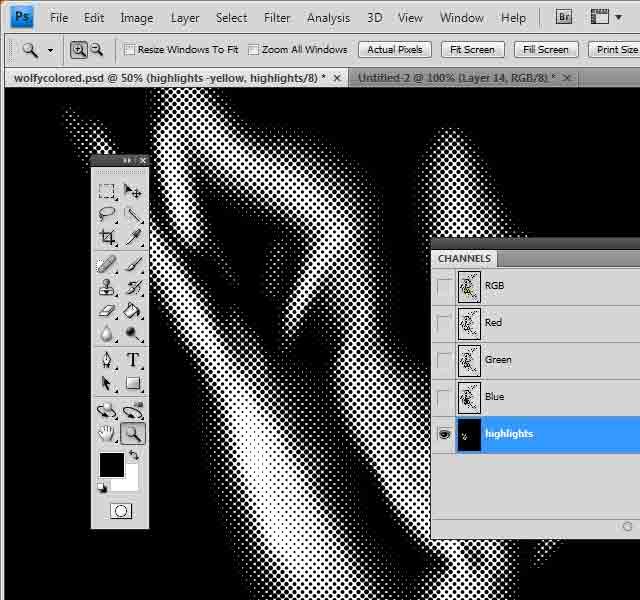
Now you should have a set of halftone dots on the "highlights" channel.
Step 6
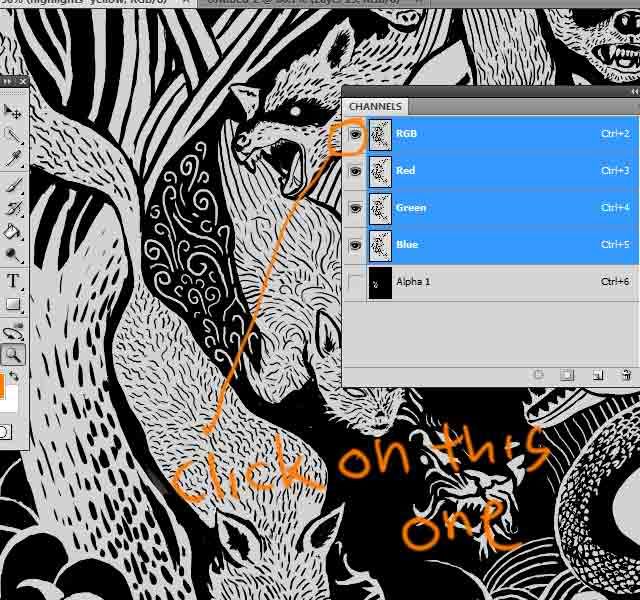
Click the top channel's eye to make all the rgb or cmyk channels visible. Click the eye of the highlights channel to hide it.
Next go to the layers palette (f7)
Step 7
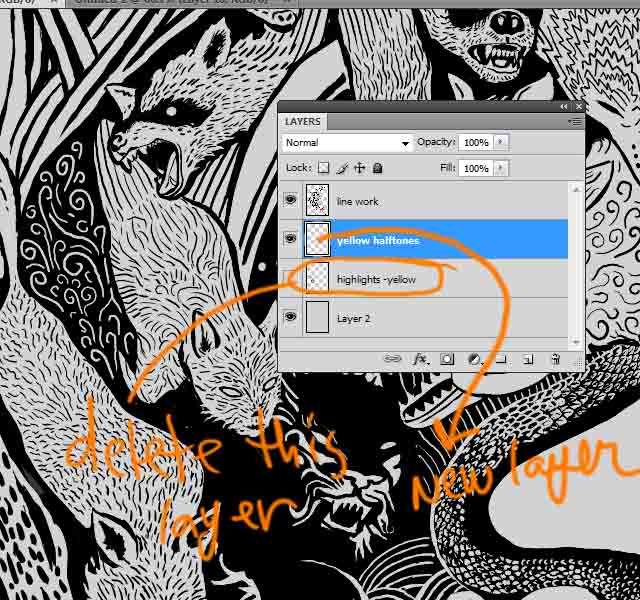
now make a new empty layer above the layer you painted, and delete the layer you painted.
Step 8
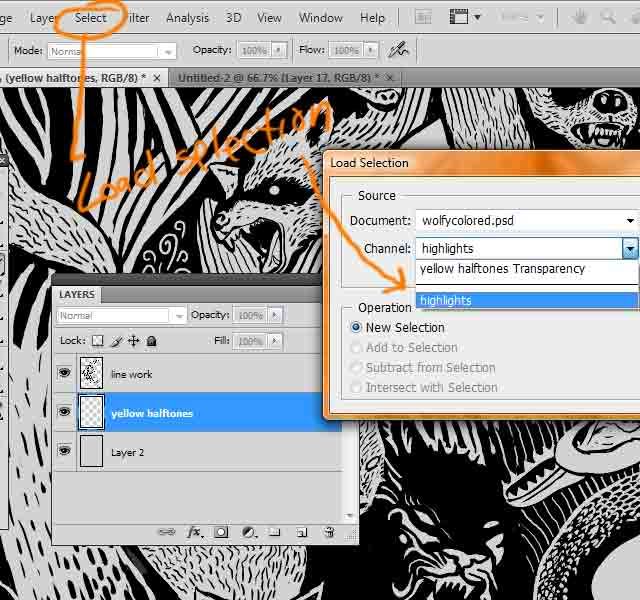
Go to select, load selection, and click on the channel you created in the drop down menu
Step 9
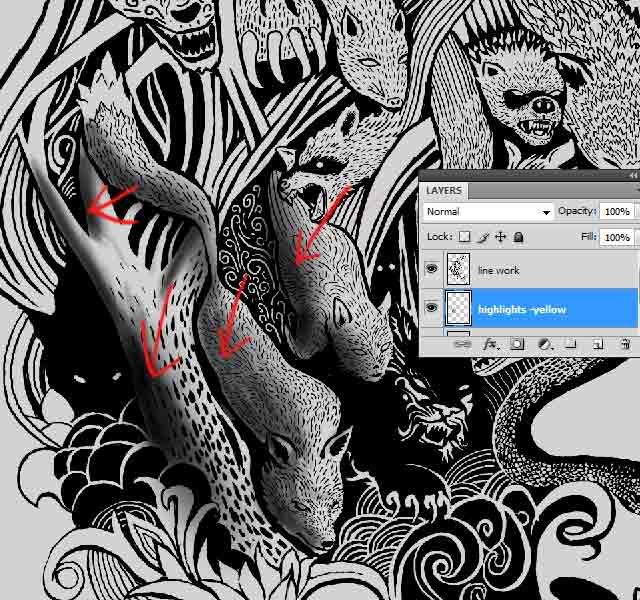
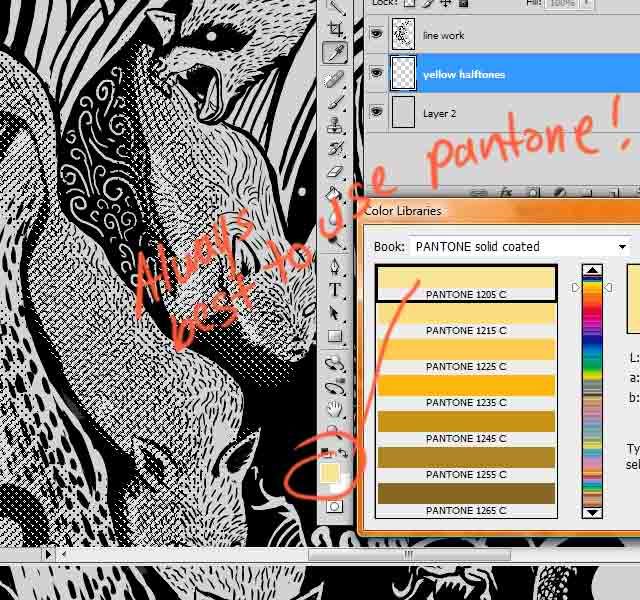 pick a color you want to use for your highlights, and press ctrl+backspace to fill your selection with it.
Step 10
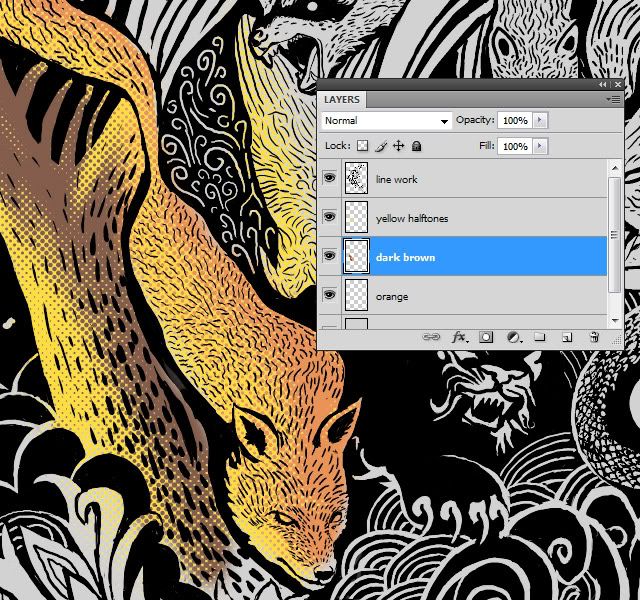
Halftones are now done. The process is the same for the shadows. Underneath the linework, highlight and shadow layers you can paint your other colors
sumber = http://www.threadless.com/profile/327680/ndstillie/blog/435380/Step_by_step_Photoshop_coloring_method_using_halftones
STEP 1:
You need your artwork to be at the printing size you want on the tshirt. My image size here is 12x19 inches at 300 dpi.
As shown, you need to have your line work on a layer by itself. Note that only black is present on the layer, no white or any other color.
If you draw scan your artwork in, you can use the super handy photoshop action here:
http://www.threadless.com/profile/63134/stickymike/blog/305238/Linework_Making_Action_for_Photoshop
Running this action will give you a layer that isolates your art on a separate transparent layer, like in the picture above.
Step 2.
Ok your linework is isolated without any colors.
In your layers palette, click on the new layer button, and make sure you drag it below your layer with your linework.
Now select a neutral gray color in your color picker and press ctrl+backspace (you can also use the paint bucket tool) to fill the entire layer you just created with the gray color.
Step 3.
In this stage I am going to add my highlights to my image. I am not concerned with colors yet, because getting the values right is more important.
First, create a new layer right above the gray layer.
Click on the layer to make it active. Now choose black in your color picker. Next in the brush setting make sure your opacity is set to around 15 percent.
Ok start painting the highlights in.
Even though it looks like i am painting shadows, these will actually be highlights where the light is hitting. For the sake of the tutorial, i'll just do the fox and surrounding area.
With the low brush opacity, you will be able to layer the brush strokes so that you get a pretty smooth tone.
Step 5: halftoning
Ok now I am ready to turn my highlights into halftones.
First hold down ctrl and click on the thumbnail of the layer that you just painted on. You should get the "marching ants" showing that you have made a slection.
With the selection still active, open your channel palette and make a new channel. rename it to "highlights"
Press alt + backspace to fill the slection with white. Now deselect everything by pressing control+d. Go to filter-pixilate-color halftone.
Put in the settings as shown. a bigger max radius makes your halftone dots bigger. I like around 7 or 8 at this size.
Now you should have a set of halftone dots on the "highlights" channel.
Step 6
Click the top channel's eye to make all the rgb or cmyk channels visible. Click the eye of the highlights channel to hide it.
Next go to the layers palette (f7)
Step 7
now make a new empty layer above the layer you painted, and delete the layer you painted.
Step 8
Go to select, load selection, and click on the channel you created in the drop down menu
Step 9
pick a color you want to use for your highlights, and press ctrl+backspace to fill your selection with it.Step 10
Halftones are now done. The process is the same for the shadows. Underneath the linework, highlight and shadow layers you can paint your other colors
sumber = http://www.threadless.com/profile/327680/ndstillie/blog/435380/Step_by_step_Photoshop_coloring_method_using_halftones


0 komentar:
Post a Comment